I’ve built and documented Windows Active Directory labs before, you will find some on this website and some on my GitHub. Linux joining AD is conceptually simpler, but operationally more fragile. One wrong DNS setting, one wrong network mode, nothing works, and now I’m mad at my computer, trying to figure out what went wrong.
This lab documents the correct mental model, and the exact steps I took to complete it.
If you have not read my earlier Linux to Active Directory lab built using VirtualBox, check it out here.
Lab Environment
Host OS: macOS
Hypervisor: UTM
Architecture: x86_64 (Emulate mode for both)
Windows Server 2022 (Domain Controller)
Rocky Linux 9 (Client)
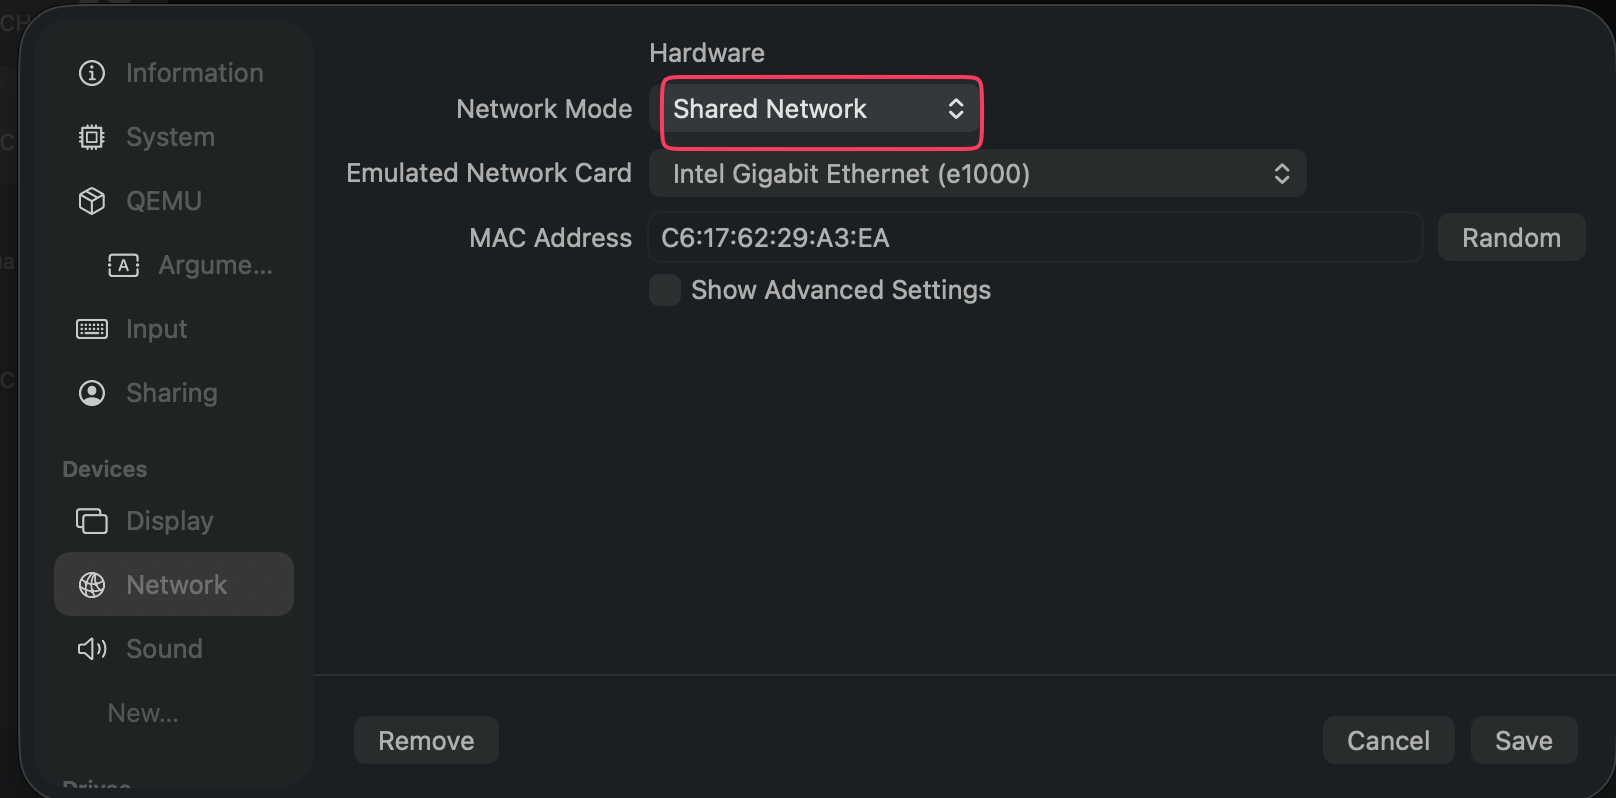
Network mode: Shared Network
Shared Network gives internet access to install the packages required for joining AD. Eventually, we will switch to Host Only, stay with me.
UTM Architecture (Emulate vs Virtualize)
Fire up UTM and select Emulate, do not select Virtualize. I previously tried this with Virtualize and at the point of joining, both VMs couldn’t see each other. This is because they are running on separate architectures. Emulate is x86_64, Virtualize is ARM.
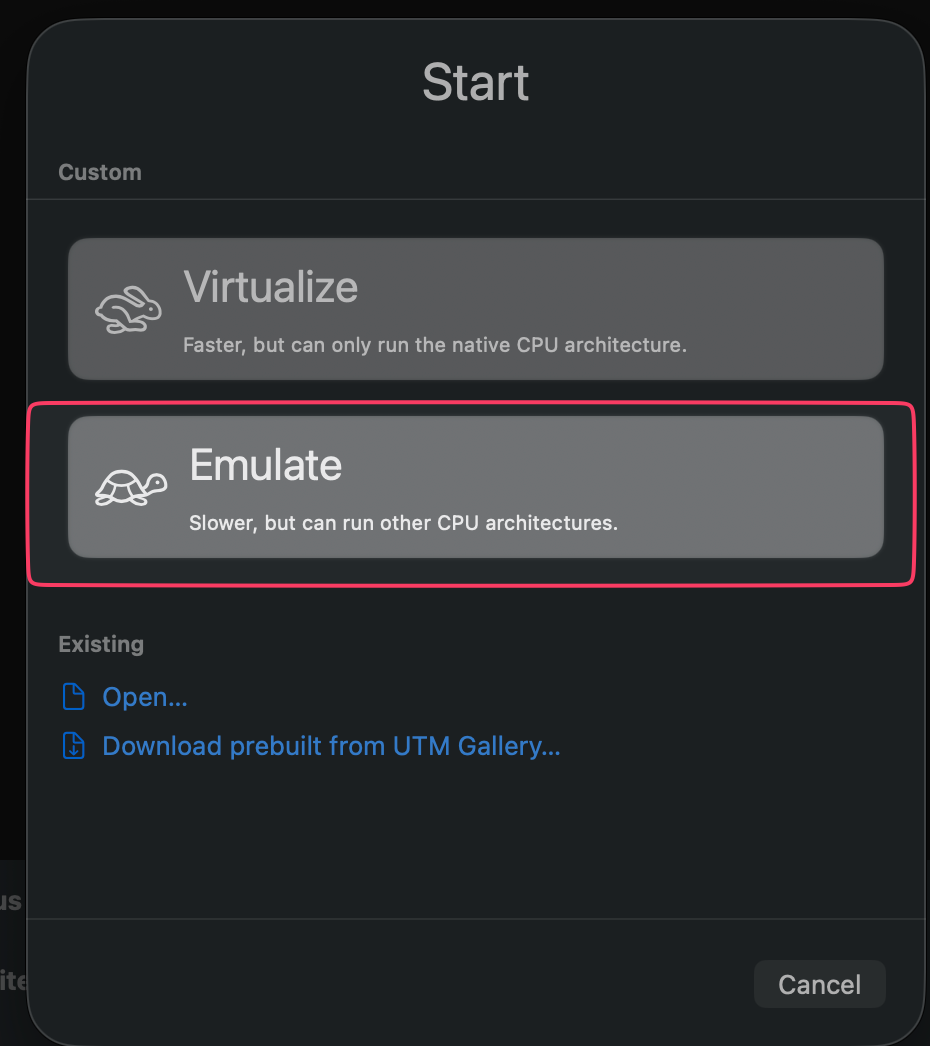
Yes, select that slow turtle. You can use Virtualize if both VMs have ARM architecture. The ARM version for Windows Server exists, but I stuck with x86_64 because I already have a DC that runs on that.
Rocky Linux Virtual Machine Setup
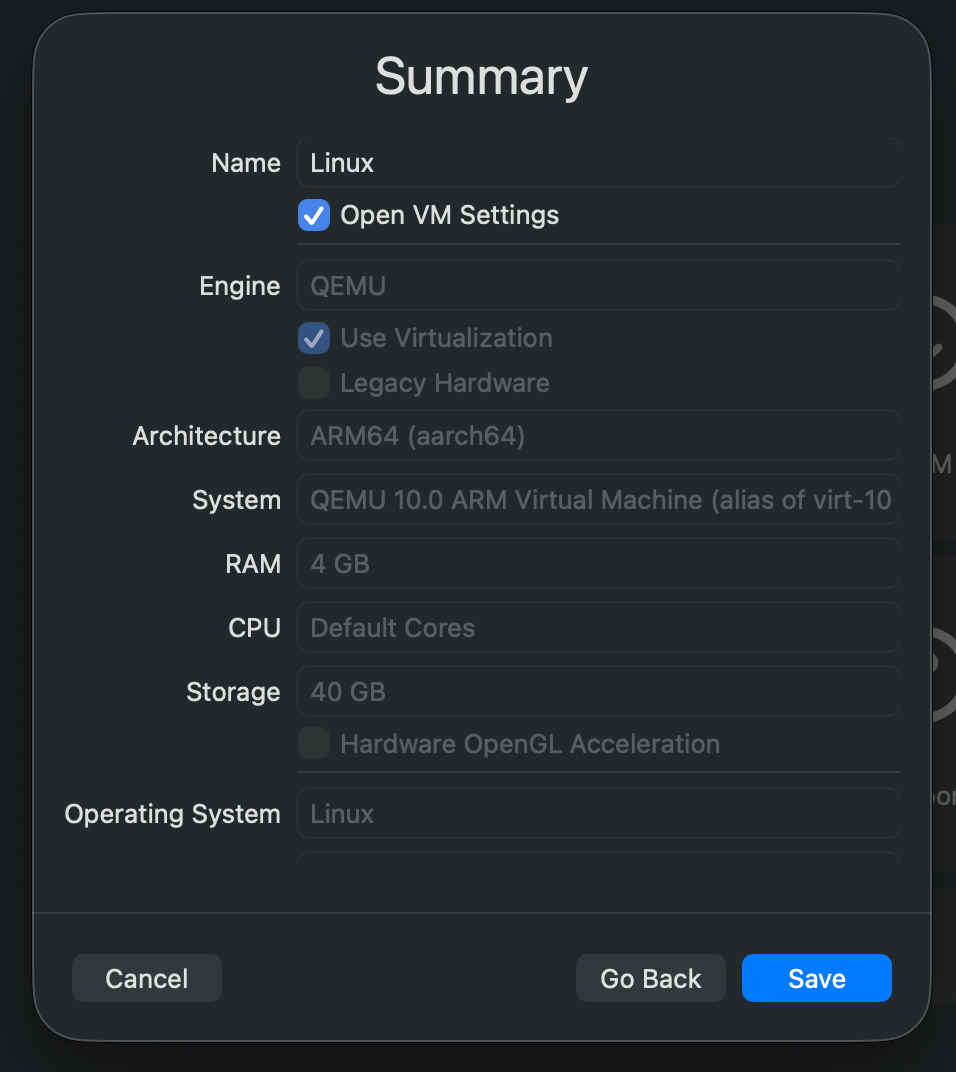
Select Linux
RAM: 4GB
Attach ISO. I used Rocky Linux 9.6, the latest stable version as at the point of writing this because in real enterprise environments, RHEL is usually the choice.
Storage: 40GB
Open Network Settings:
Network Mode: Shared Network. This gives the VM internet access so I can install packages before isolating and joining AD.
Save and start the Rocky Linux VM.
Rocky Linux Installation
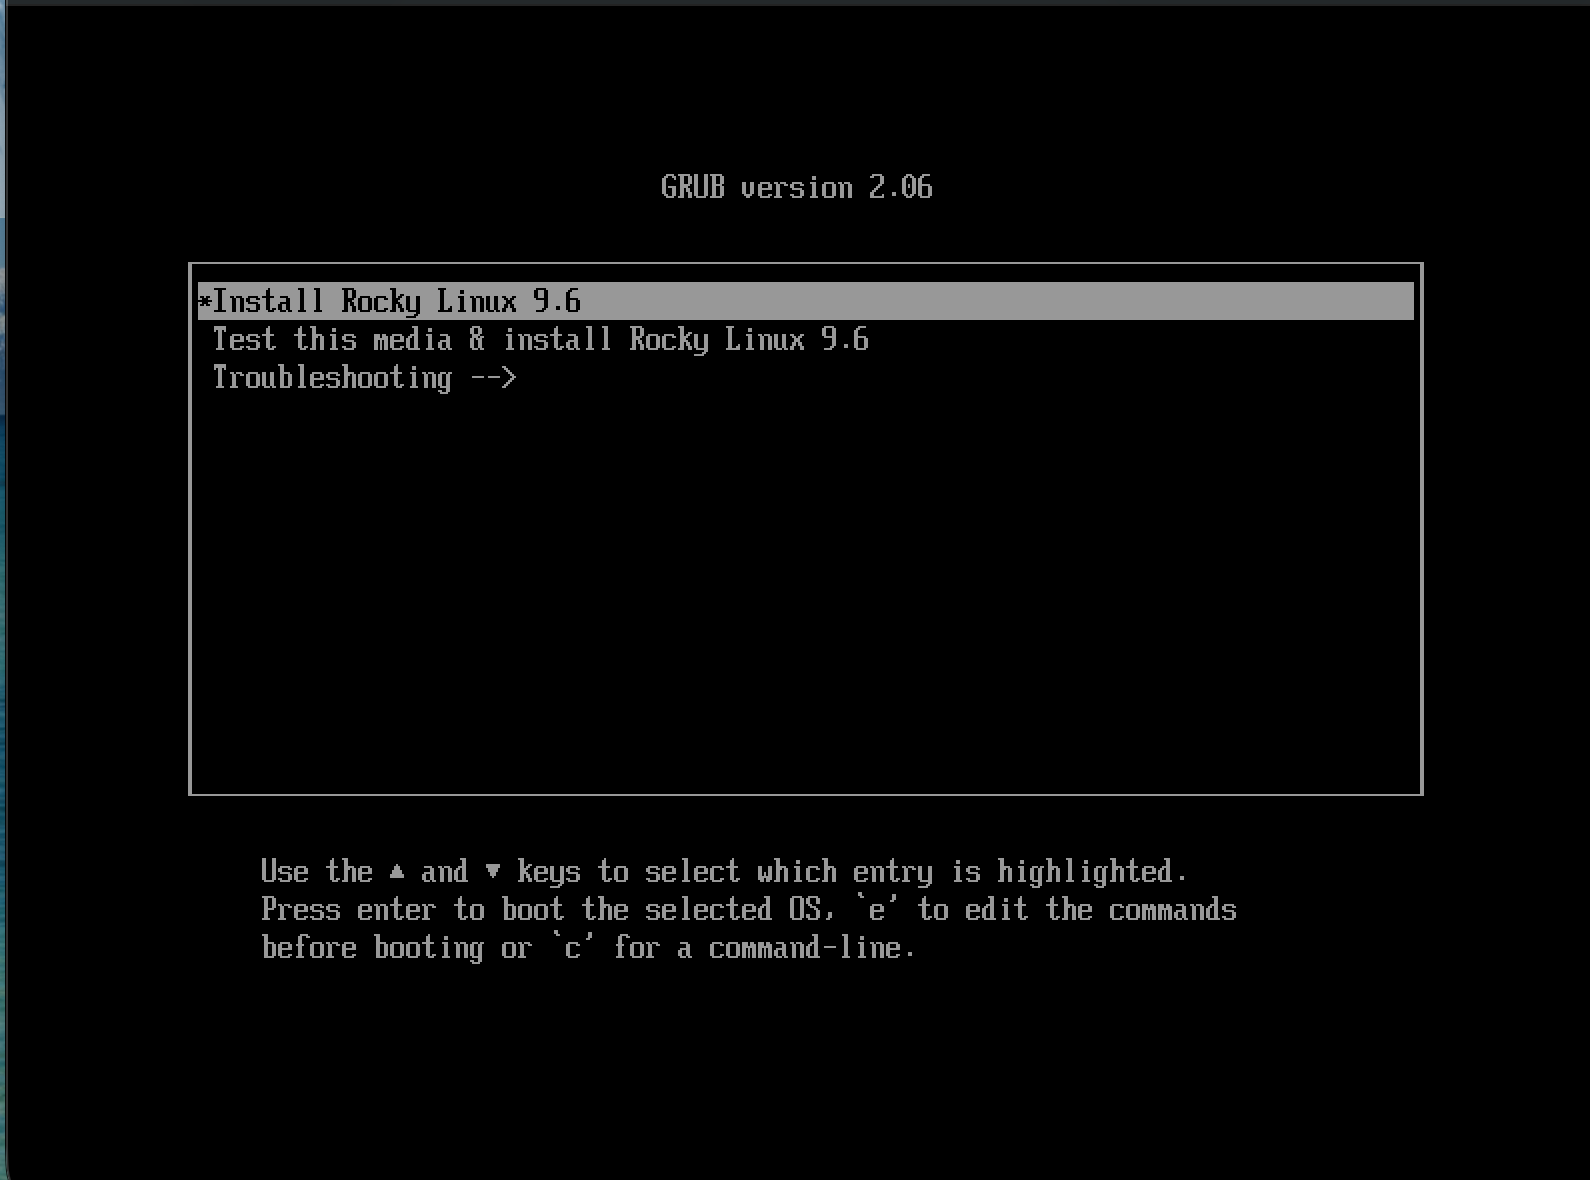
Select Install Rocky Linux 9.6
Language: English
Installation Destination: use default disk, automatic partitioning
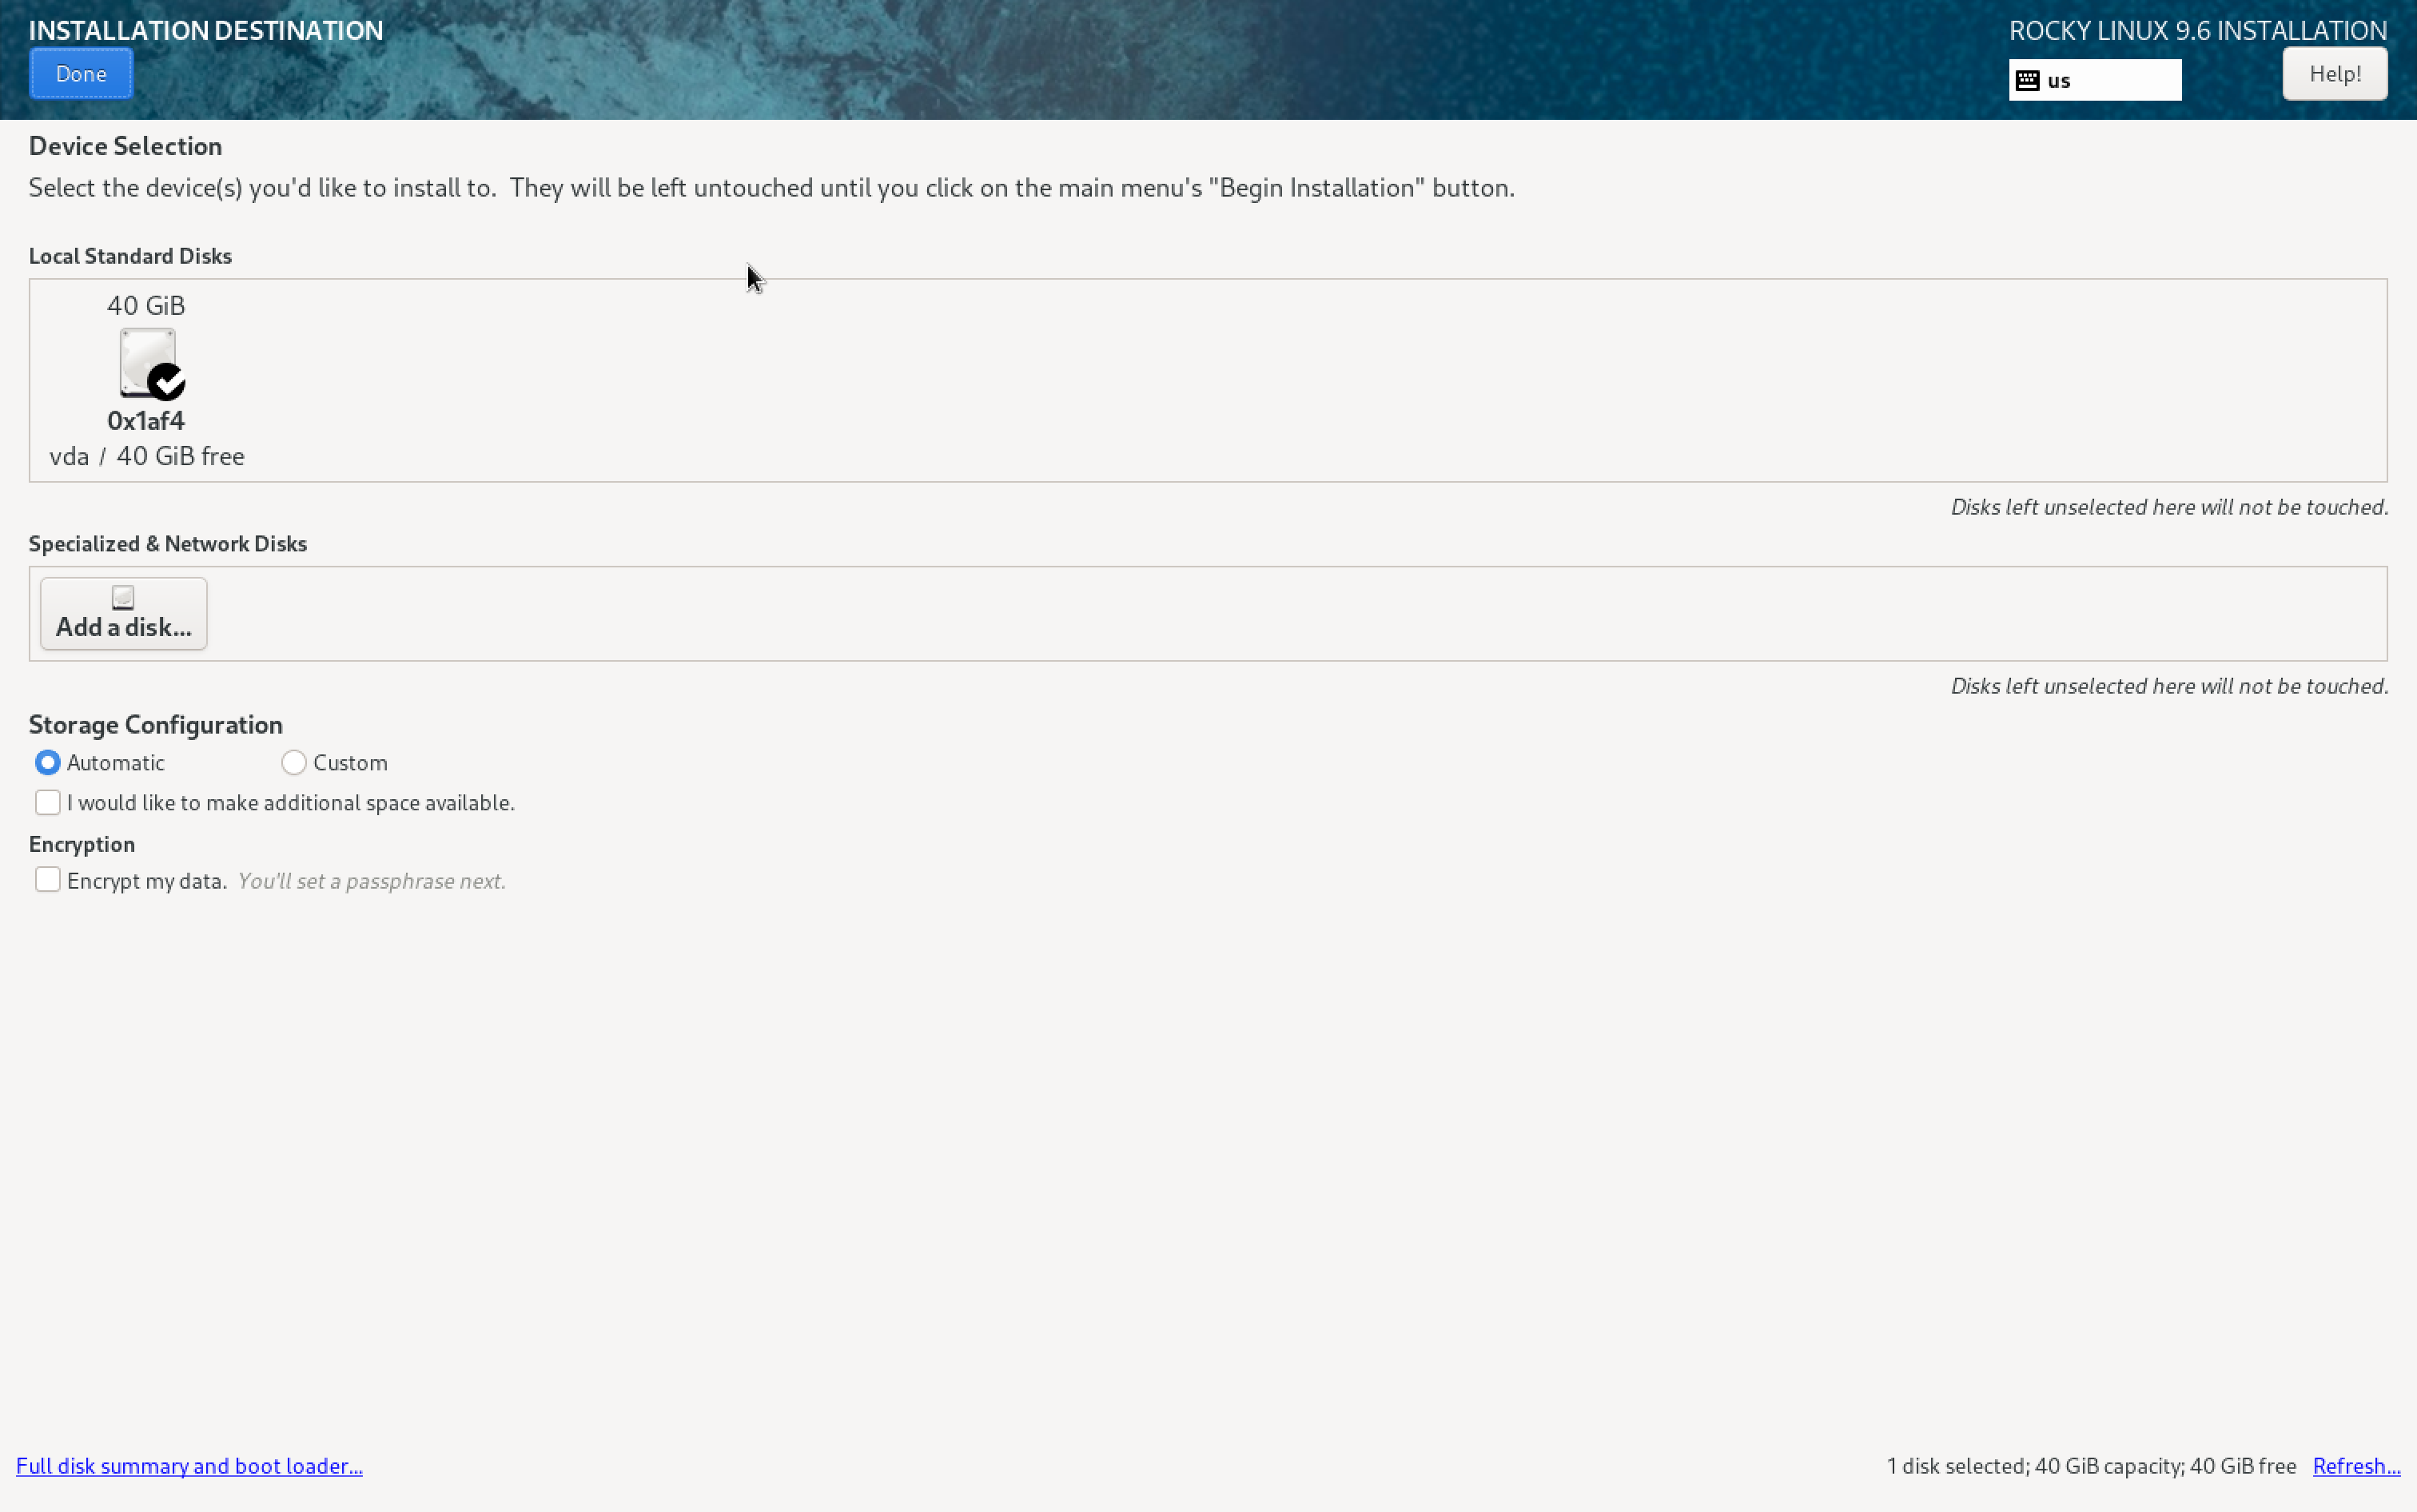
Create a root password
Uncheck lock root account. I chose this because I need full root access during the lab.
Allow root SSH login with password, because the VM doesn’t need remote password-based access.
Create a user
Make the user administrator and require a password to use the account.

Begin installation. Once the installation is done, reboot the system.
Eject the ISO file if it doesn’t auto eject.
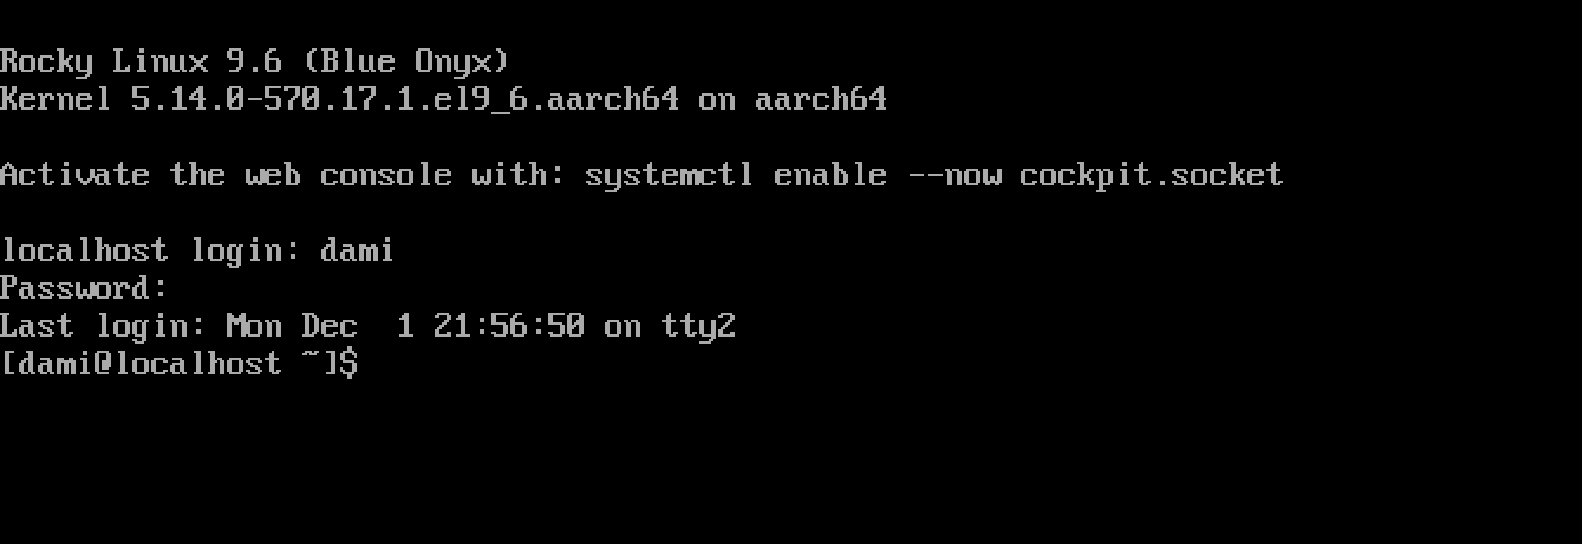
Login, and now we are in.

Switch to Command Line Mode
I do not need a GUI for this lab.
sudo systemctl set-default multi-user.target
This changes the default boot target to CLI.
To switch immediately without rebooting:
sudo systemctl isolate multi-user.target
This shuts down GNOME and switches into a full terminal environment without rebooting.
System Preparation
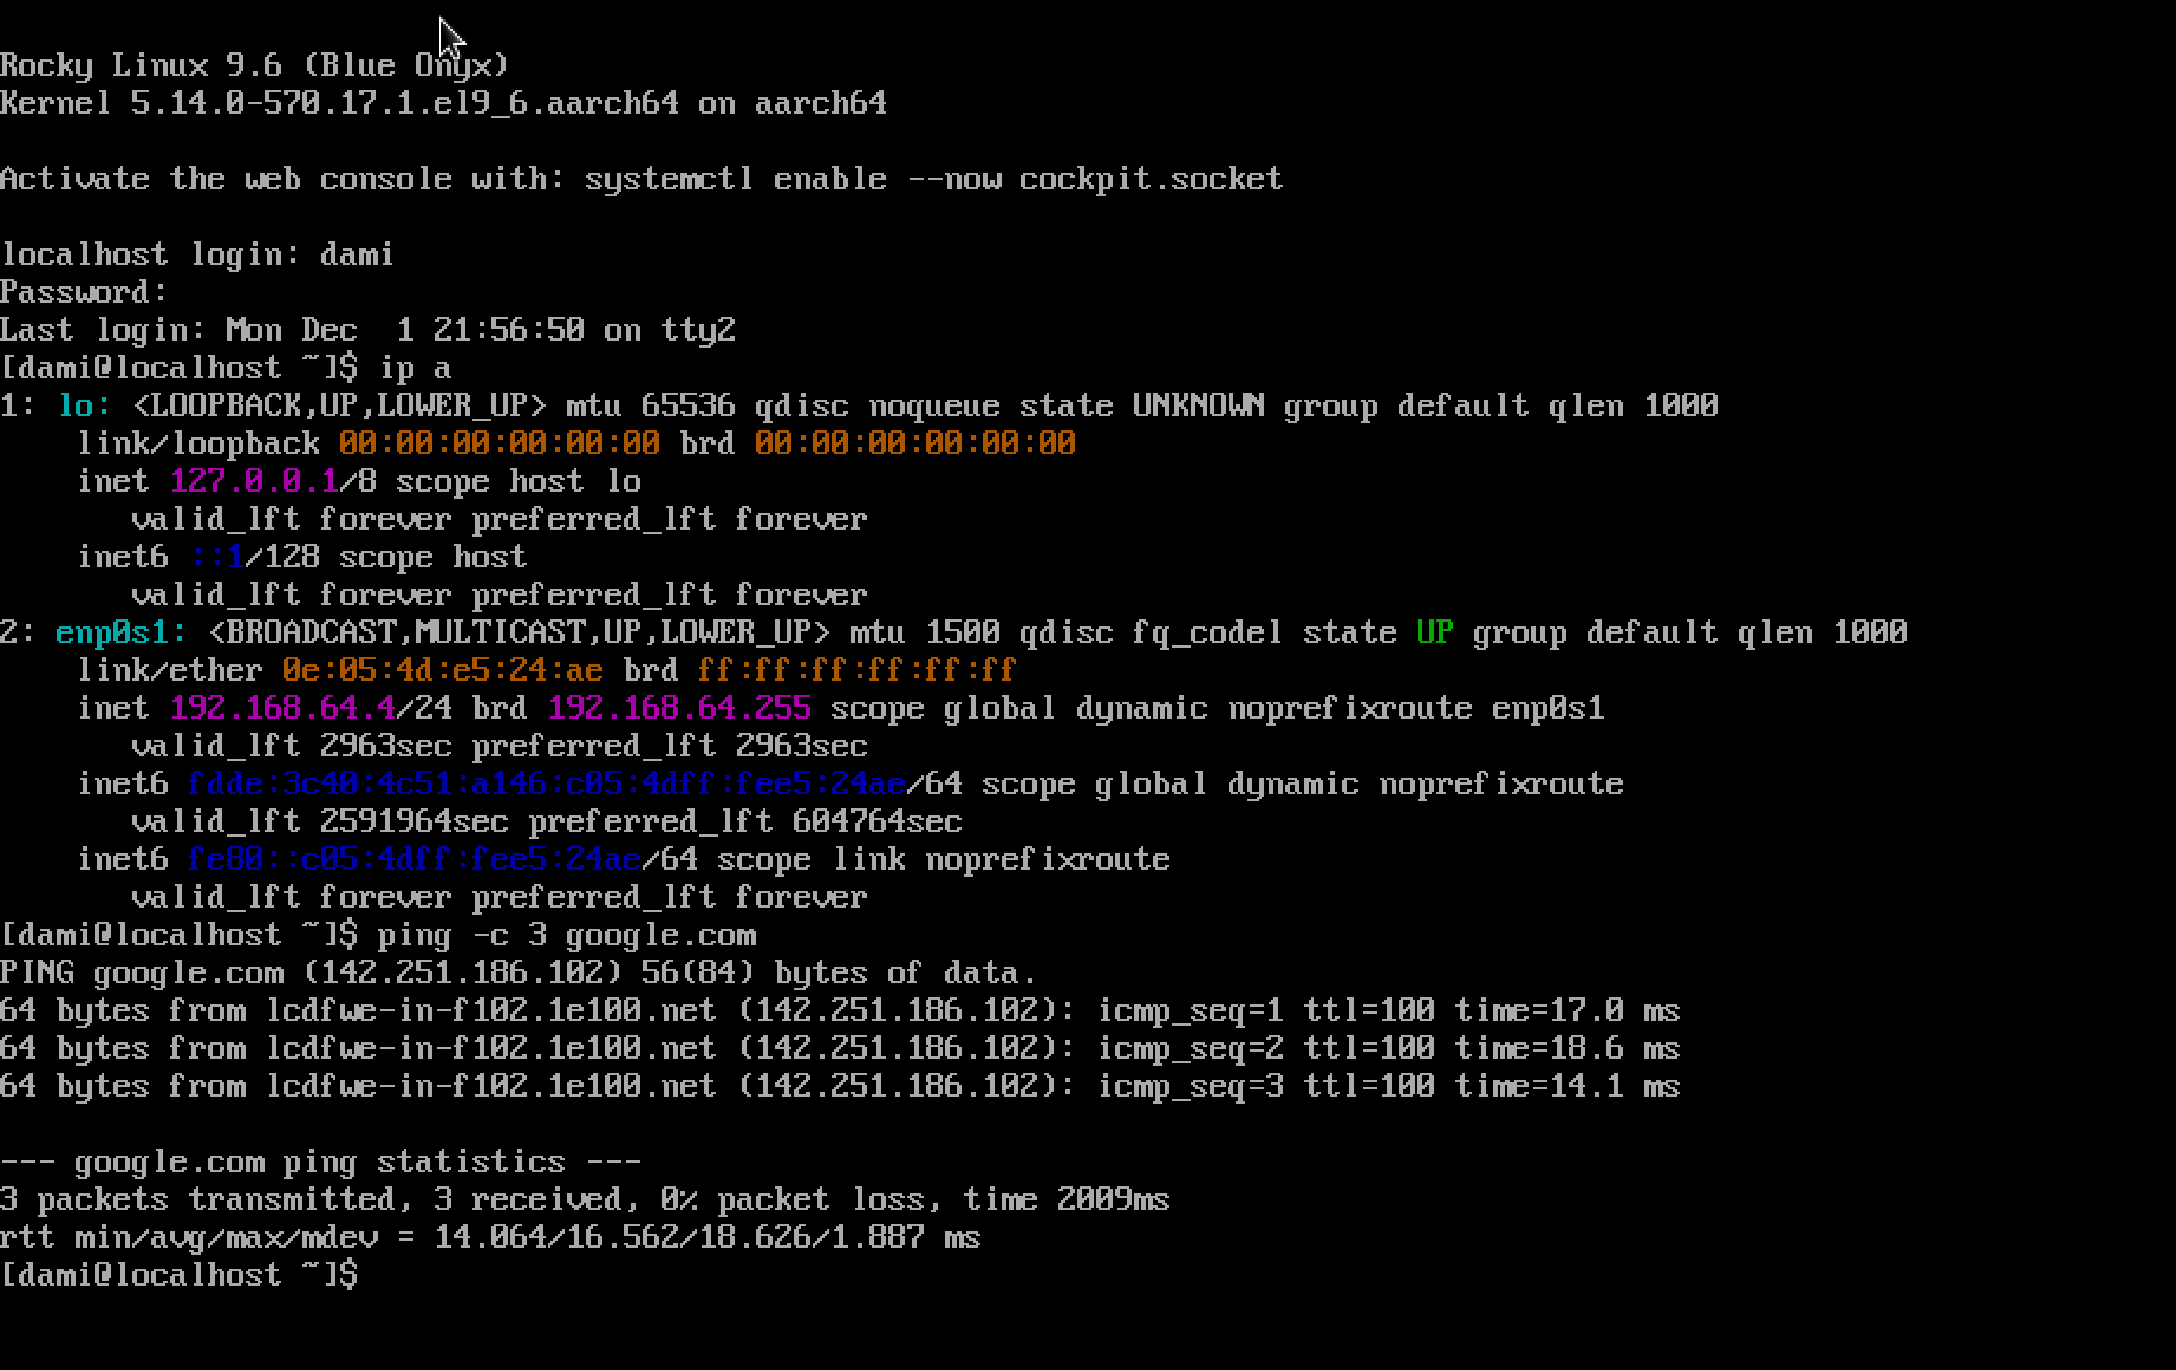
Confirm internet access:
ping -c 3 google.com
Update Rocky:
sudo dnf update -y
Install packages for the AD join:
sudo dnf install -y \
  sssd \
  realmd \
  oddjob \
  oddjob-mkhomedir \
  adcli \
  samba-common-tools \
  krb5-workstation \
  chrony
Set the hostname:
sudo hostnamectl set-hostname rocky.damibuilds.com
exec bash
Time Synchronization (Chrony)
Enable and start Chrony:
sudo systemctl enable --now chronyd
Edit the configuration:
sudo nano /etc/chrony.conf
Comment out the default pool lines and add the domain controller.

Restart Chrony:
sudo systemctl restart chronyd
Verify sync:
chronyc sources
You should see the domain controller listed as the active time source.
^* DC01.damibuilds.com 1 6 17 +0.1s +/- 0.2ms
If time sync is off by more than a few minutes, Kerberos will fail later even if DNS looks correct.
DNS Configuration (Before Isolation)
Set DNS to point to the domain controller:
sudo nmcli connection modify enp0s1 \
  ipv4.method manual \
  ipv4.addresses 192.168.64.30/24 \
  ipv4.gateway 192.168.64.1 \
  ipv4.dns 192.168.64.10
Disable automatic DNS:
sudo nmcli connection modify enp0s1 ipv4.ignore-auto-dns yes
Apply changes:
sudo nmcli connection down enp0s1
sudo nmcli connection up enp0s1
Confirm DNS:
cat /etc/resolv.conf
Nameserver should point to the domain controller.

Test resolution:
nslookup damibuilds.com
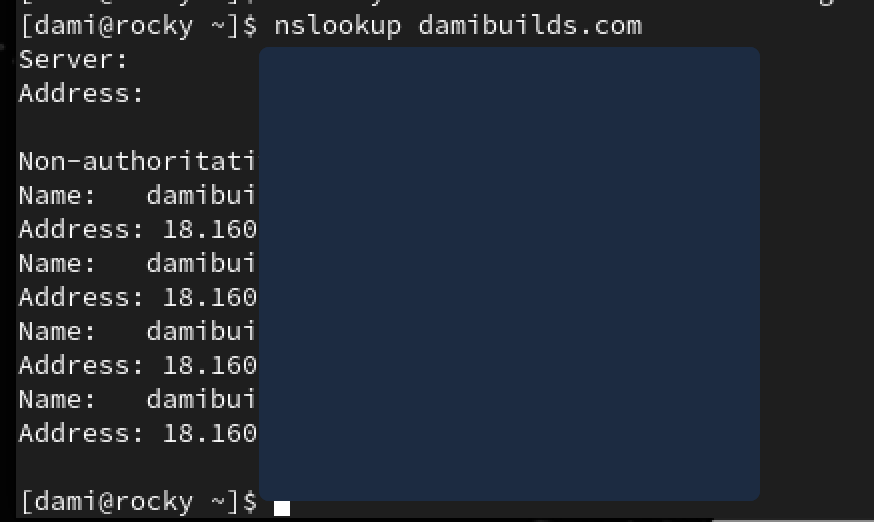
At this stage, it was still resolving my public website IP.
This is the point where I need to isolate my network, and switch to Host Only. nslookup proves that I am still connected to the internet. For this lab to run, I need to isolate the VMs.
This is a crucial point where most Linux AD joins live or die.
Network Isolation (Host Only)
Shut down the VM and set the network adapter to Host Only, just like the domain controller, so they are isolated and can still talk to each other.
Once the VM restarts:
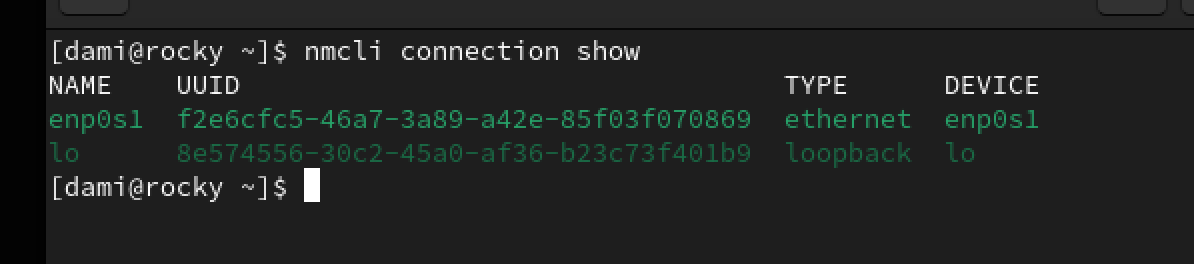
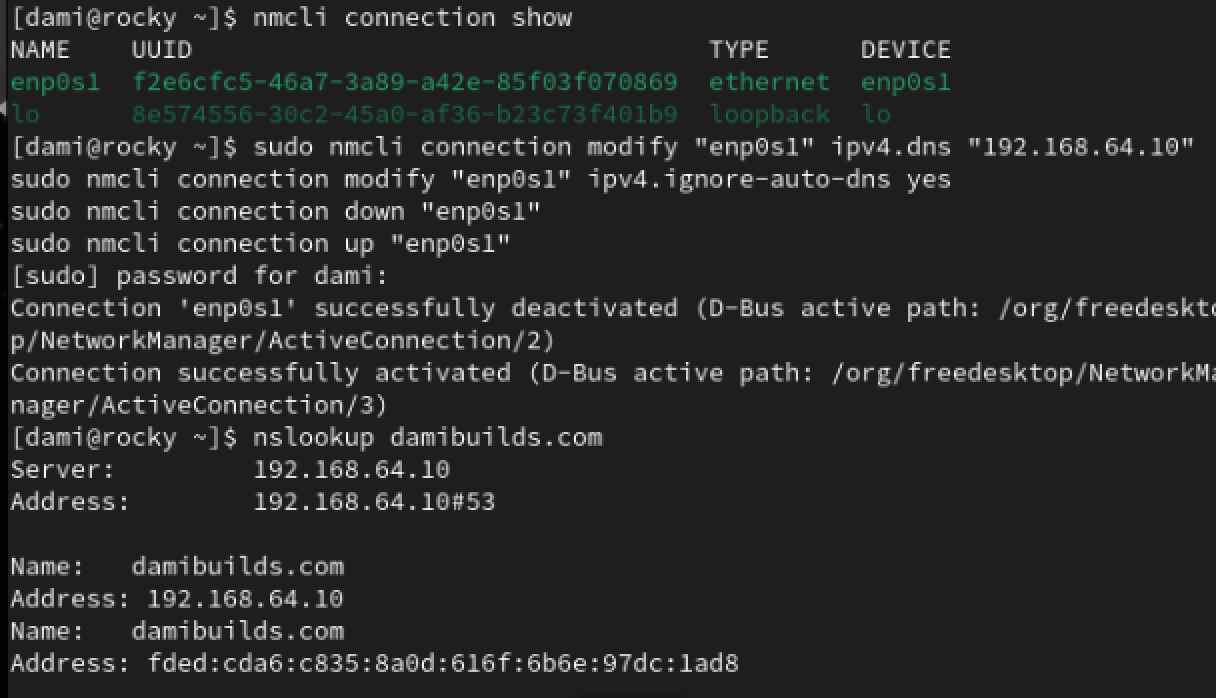
nmcli connection show
Reapply DNS:
sudo nmcli connection modify enp0s1 ipv4.dns 192.168.64.10
sudo nmcli connection modify enp0s1 ipv4.ignore-auto-dns yes
sudo nmcli connection down enp0s1
sudo nmcli connection up enp0s1
Run:
nslookup damibuilds.com
Connectivity Verification
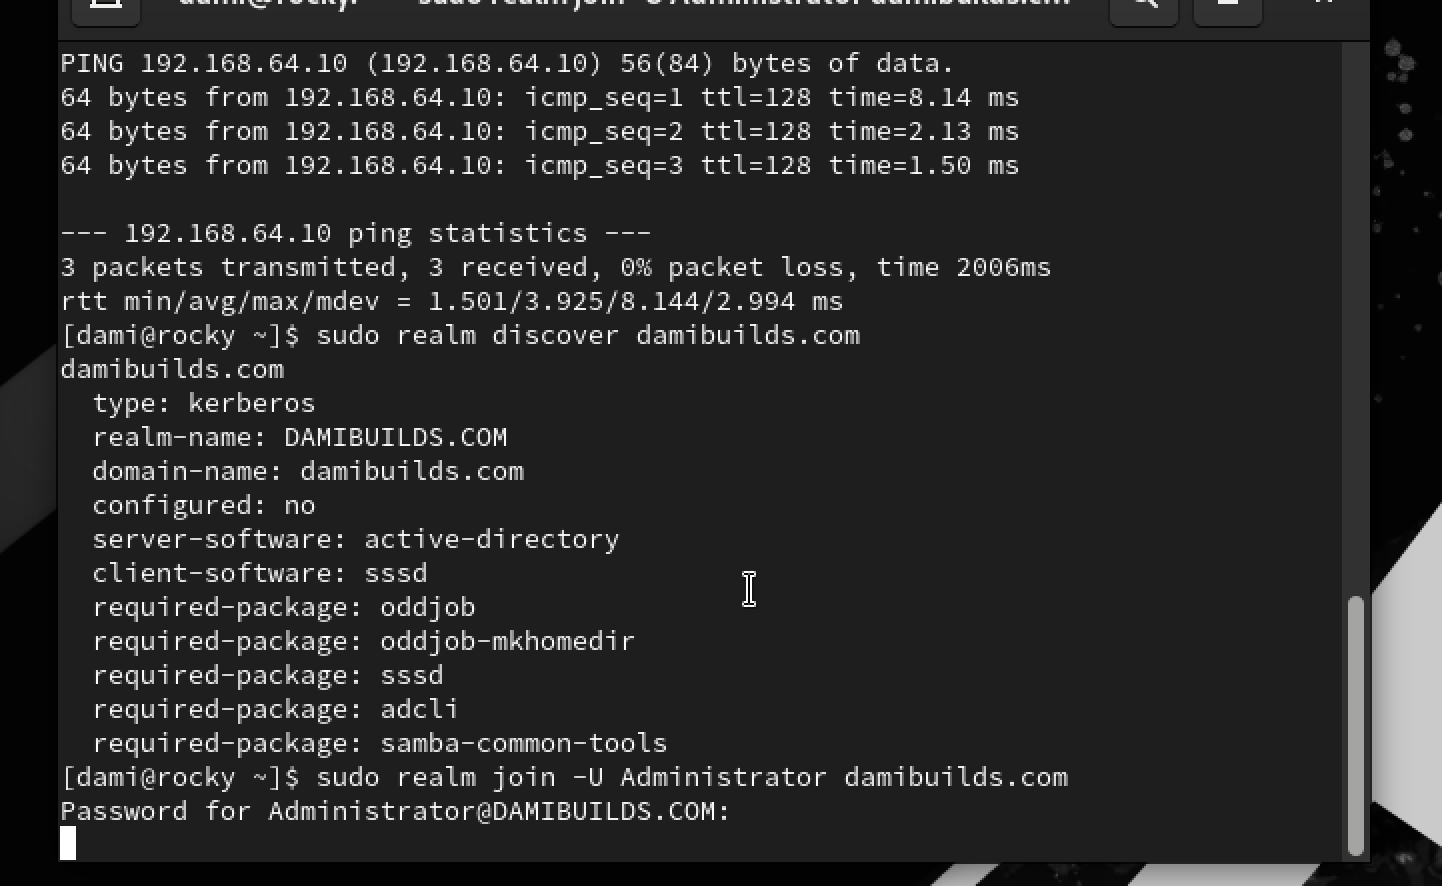
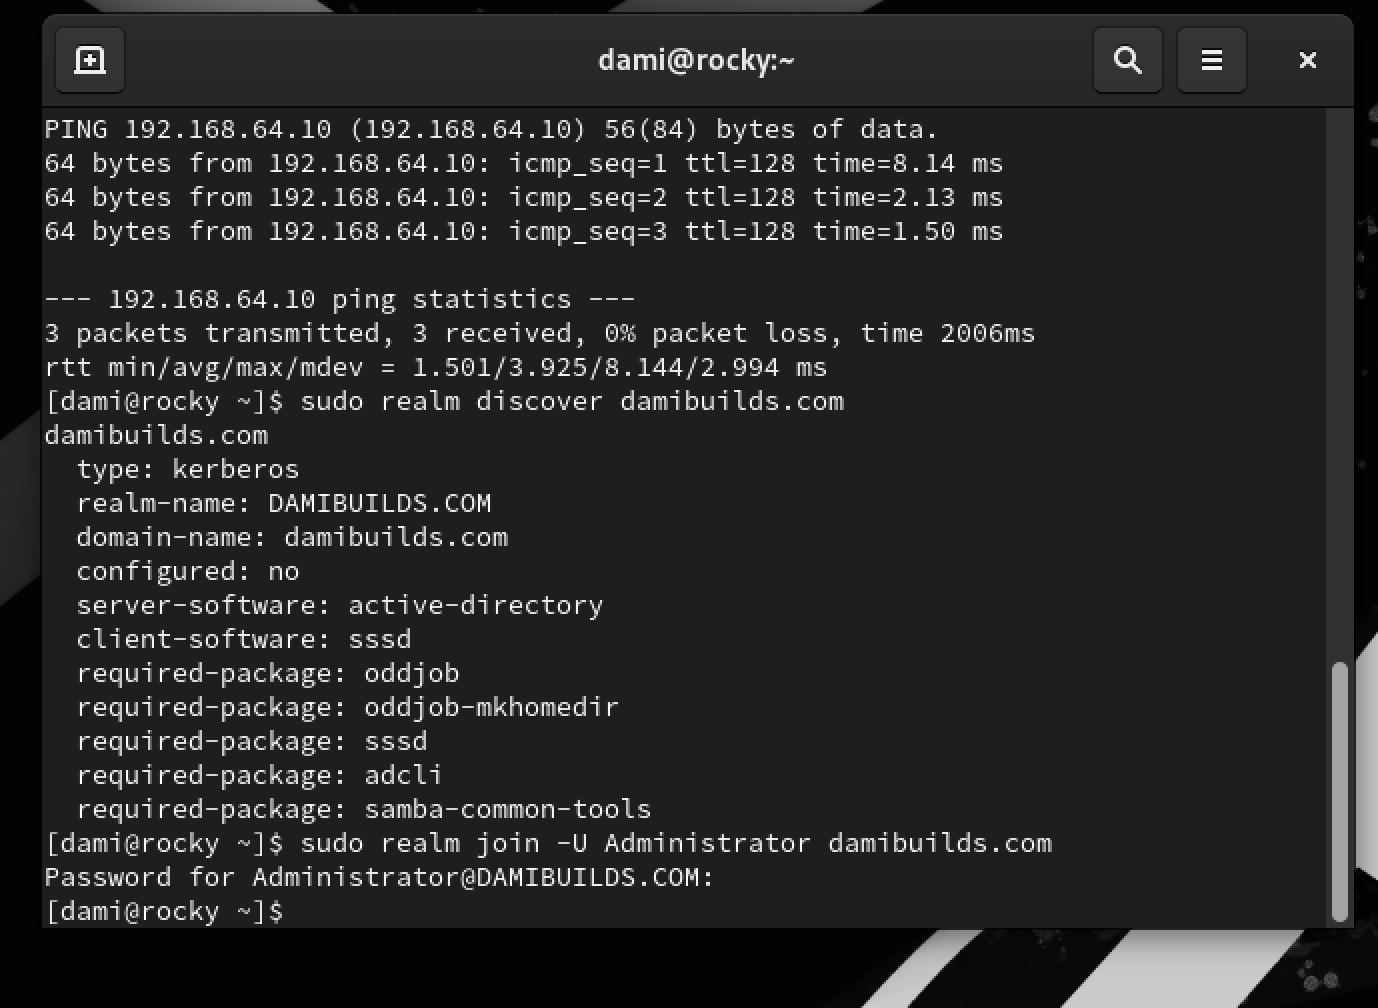
ping -c 3 192.168.64.10
nslookup dc01.damibuilds.com
nslookup damibuilds.com
You should see replies from 192.168.64.10.
If ping fails or nslookup points anywhere else, DNS or Host Only is still wrong.
Domain Discovery
On Rocky:
sudo realm discover damibuilds.com
If DNS + time are okay, you’ll get a block of info with:
- domain-name:
damibuilds.com - server-software:
active-directory - configured:
no
Domain Join
The main point of this lab is joining the domain.
sudo realm join -U Administrator damibuilds.com
Use your Domain Admin password from DC01.
No error message means join was successful.
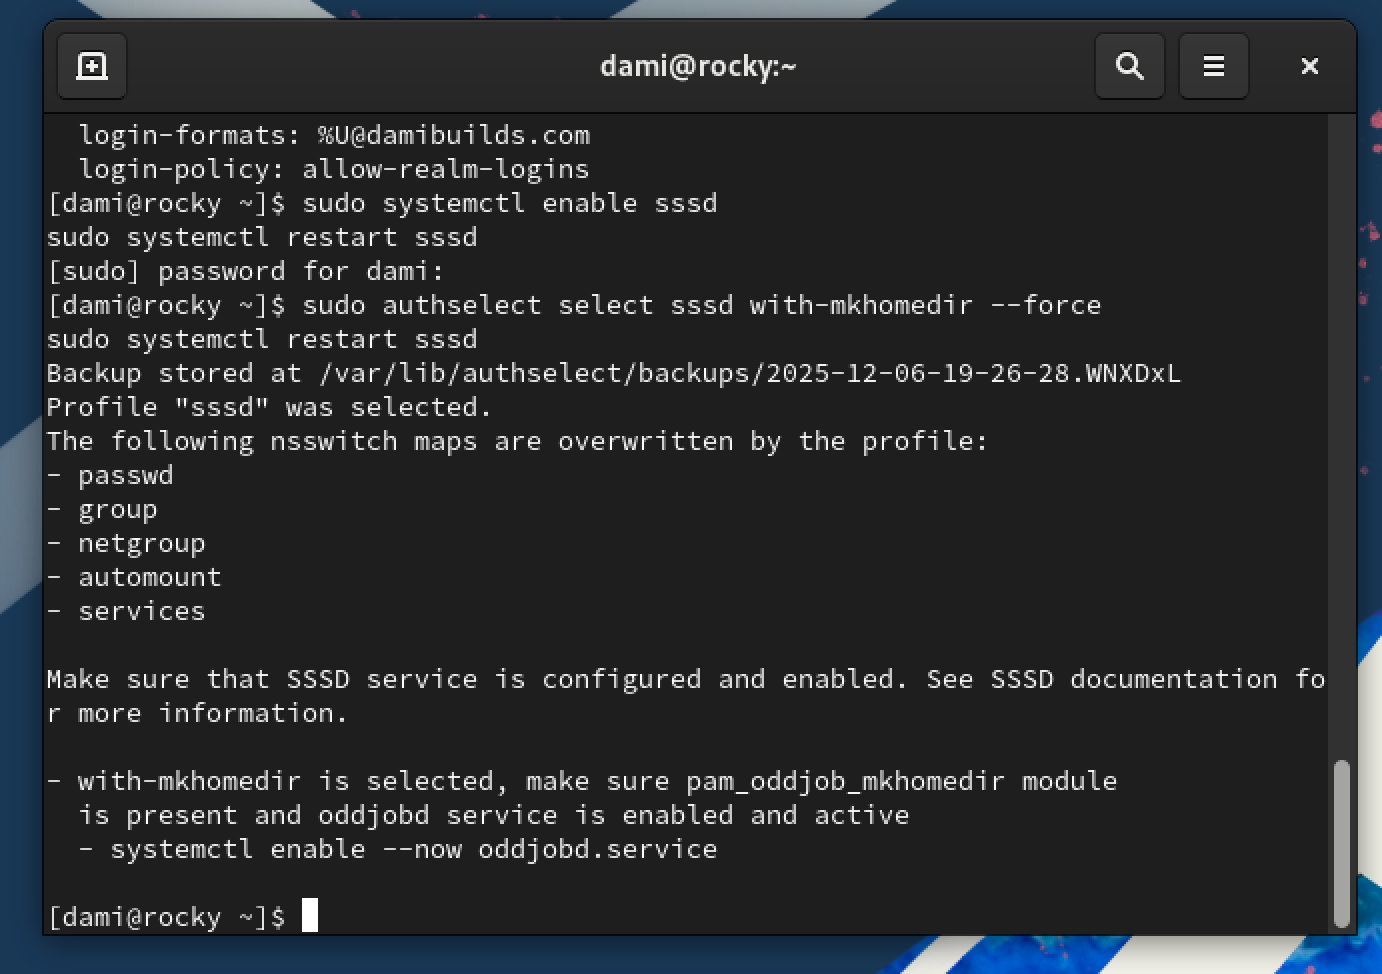
Post-Join Configuration
Ensure SSSD is enabled and running:
sudo systemctl enable sssd
sudo systemctl restart sssd
SSSD lets the Linux system understand and trust identity information that lives in Active Directory.
Enable home directory creation:
sudo authselect select sssd with-mkhomedir --force
sudo systemctl restart sssd
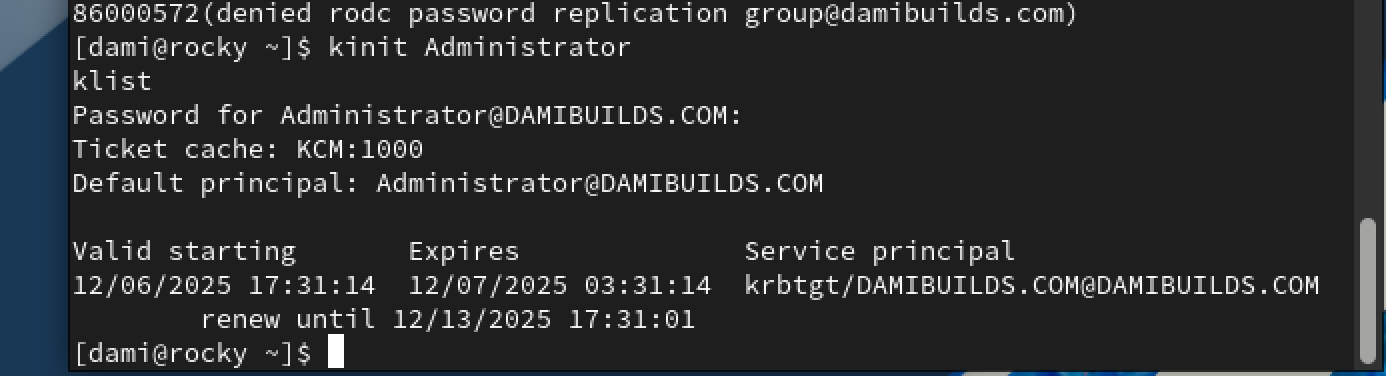
Kerberos Verification
kinit Administrator
klist
klist should show a valid ticket.
Kerberos is the authentication system used by Active Directory. It replaces passwords being sent over the network with time-based, encrypted tickets. Kerberos basically confirms if a user is who they claim to be.
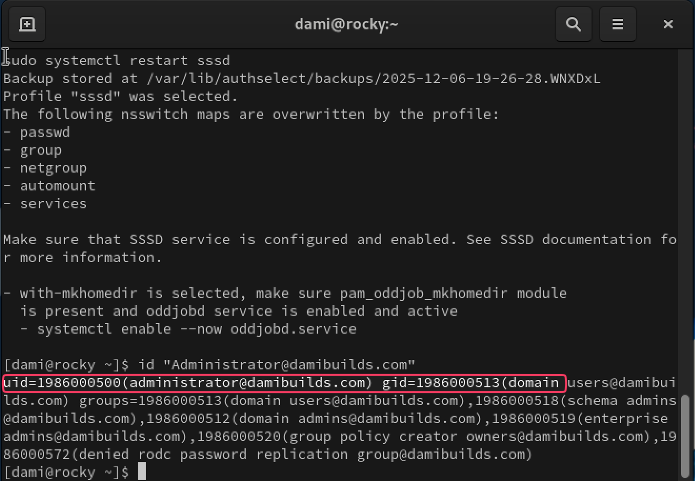
Identity Verification
id Administrator@damibuilds.com
If you see a UID, GID, and groups, the join is complete.
Create a Test AD User
Create a user in Active Directory Users and Computers on the domain controller.
In the DC, inside Windows Server, using the GUI
- On DC01, open Server Manager.
- Top right, click Tools -> Active Directory Users and Computers.

- In the left pane, click domain:
- damibuilds.com
- Expand it, click on the Users container.
- Right click Users -> New -> User.
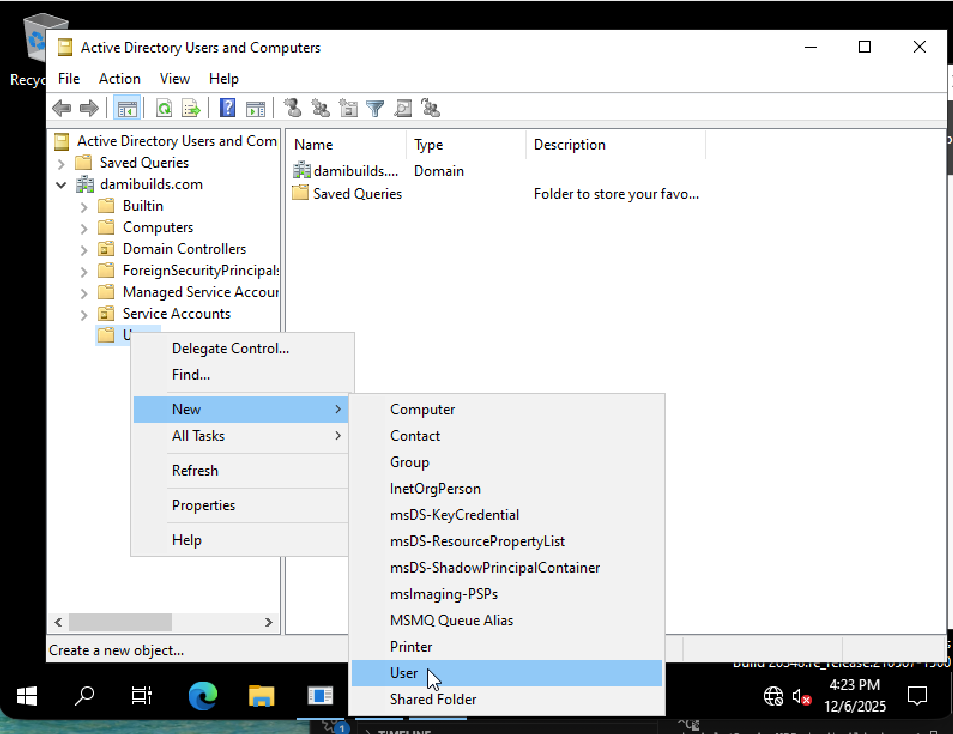
First name: Test
Last name: User
Username: testuser1
UPN suffix: @damibuilds.com
Set a strong password.
Uncheck User must change password at next logon.

Allow Domain Logins
Switch to the Rocky terminal:
Right now, realm may already allow all users, but we will be explicit so there is no doubt.
- Open a terminal on Rocky.
- Run:
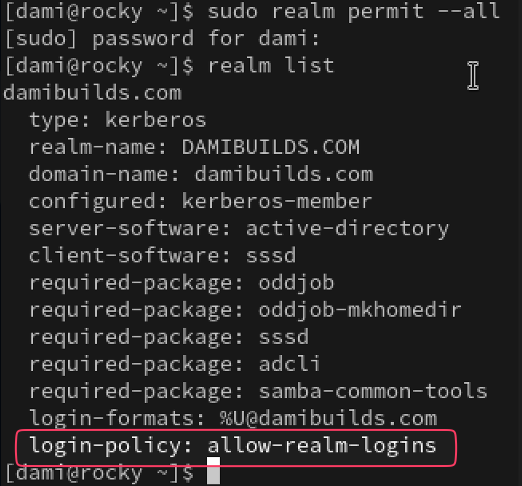
sudo realm permit –allThis tellsSSSD / realmd: Any user fromdamibuilds.comis allowed to log in. If you want to be stricter, you can switch to:
sudo realm deny --all
sudo realm permit testuser1@damibuilds.com
but for this lab, I used --all to keep it simple.
Confirm what is configured with:
realm list
Look for the login-policy or permitted-logins section.
Log In as a Domain User
We will do it two ways.
- CLI login test
In the Rocky terminal
- First, make sure id lookup works:
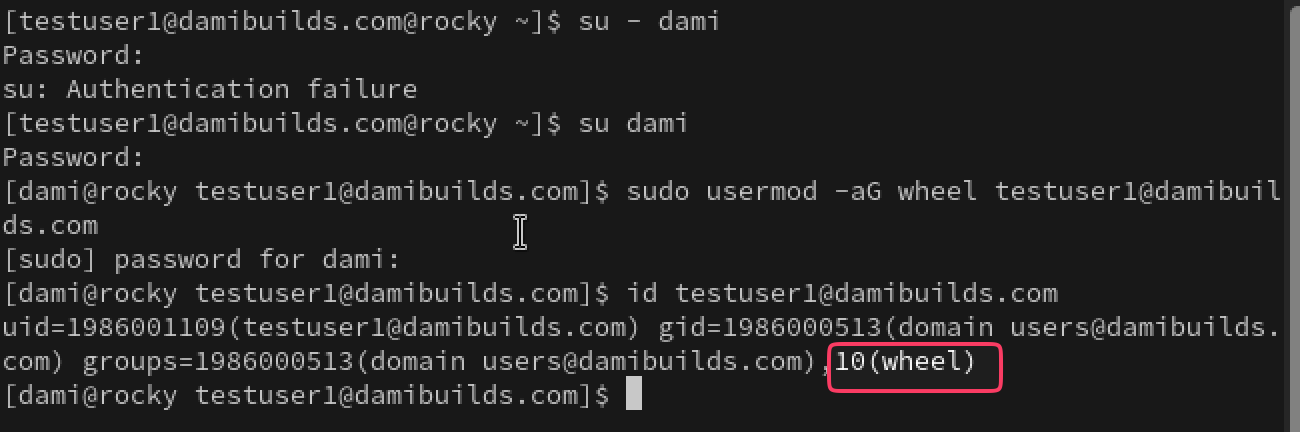
id testuser1@damibuilds.com

- Now try an actual login via
su:su - testuser1@damibuilds.com
You will be prompted for the AD password you set on DC01.

The user changing to testuser1@damibuilds.com@rocky is confirmation that we are in! A new home directory was also automatically created.
Verify:
pwd
whoami
To return to the original user exit
To add the test user as a member of the wheel group, basically making them an Admin do this:
sudo usermod -aG wheel testuser1@damibuilds.com
- GUI login test (like a Windows domain login)
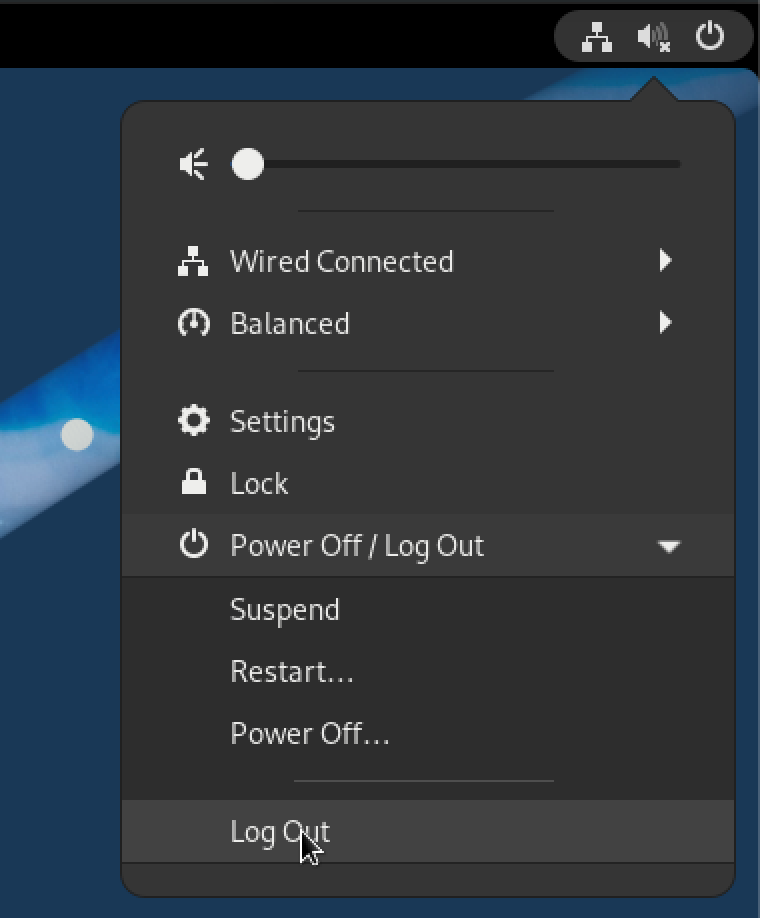
- Log out from the current GNOME session (top right menu -> Power -> Log Out).
- At the login screen, click into the username field.
- Type:
- Username: testuser1@damibuilds.com
- Password: AD password
- The first login might be slightly slower, because:
- SSSD is creating the home directory
- GNOME is creating user config files
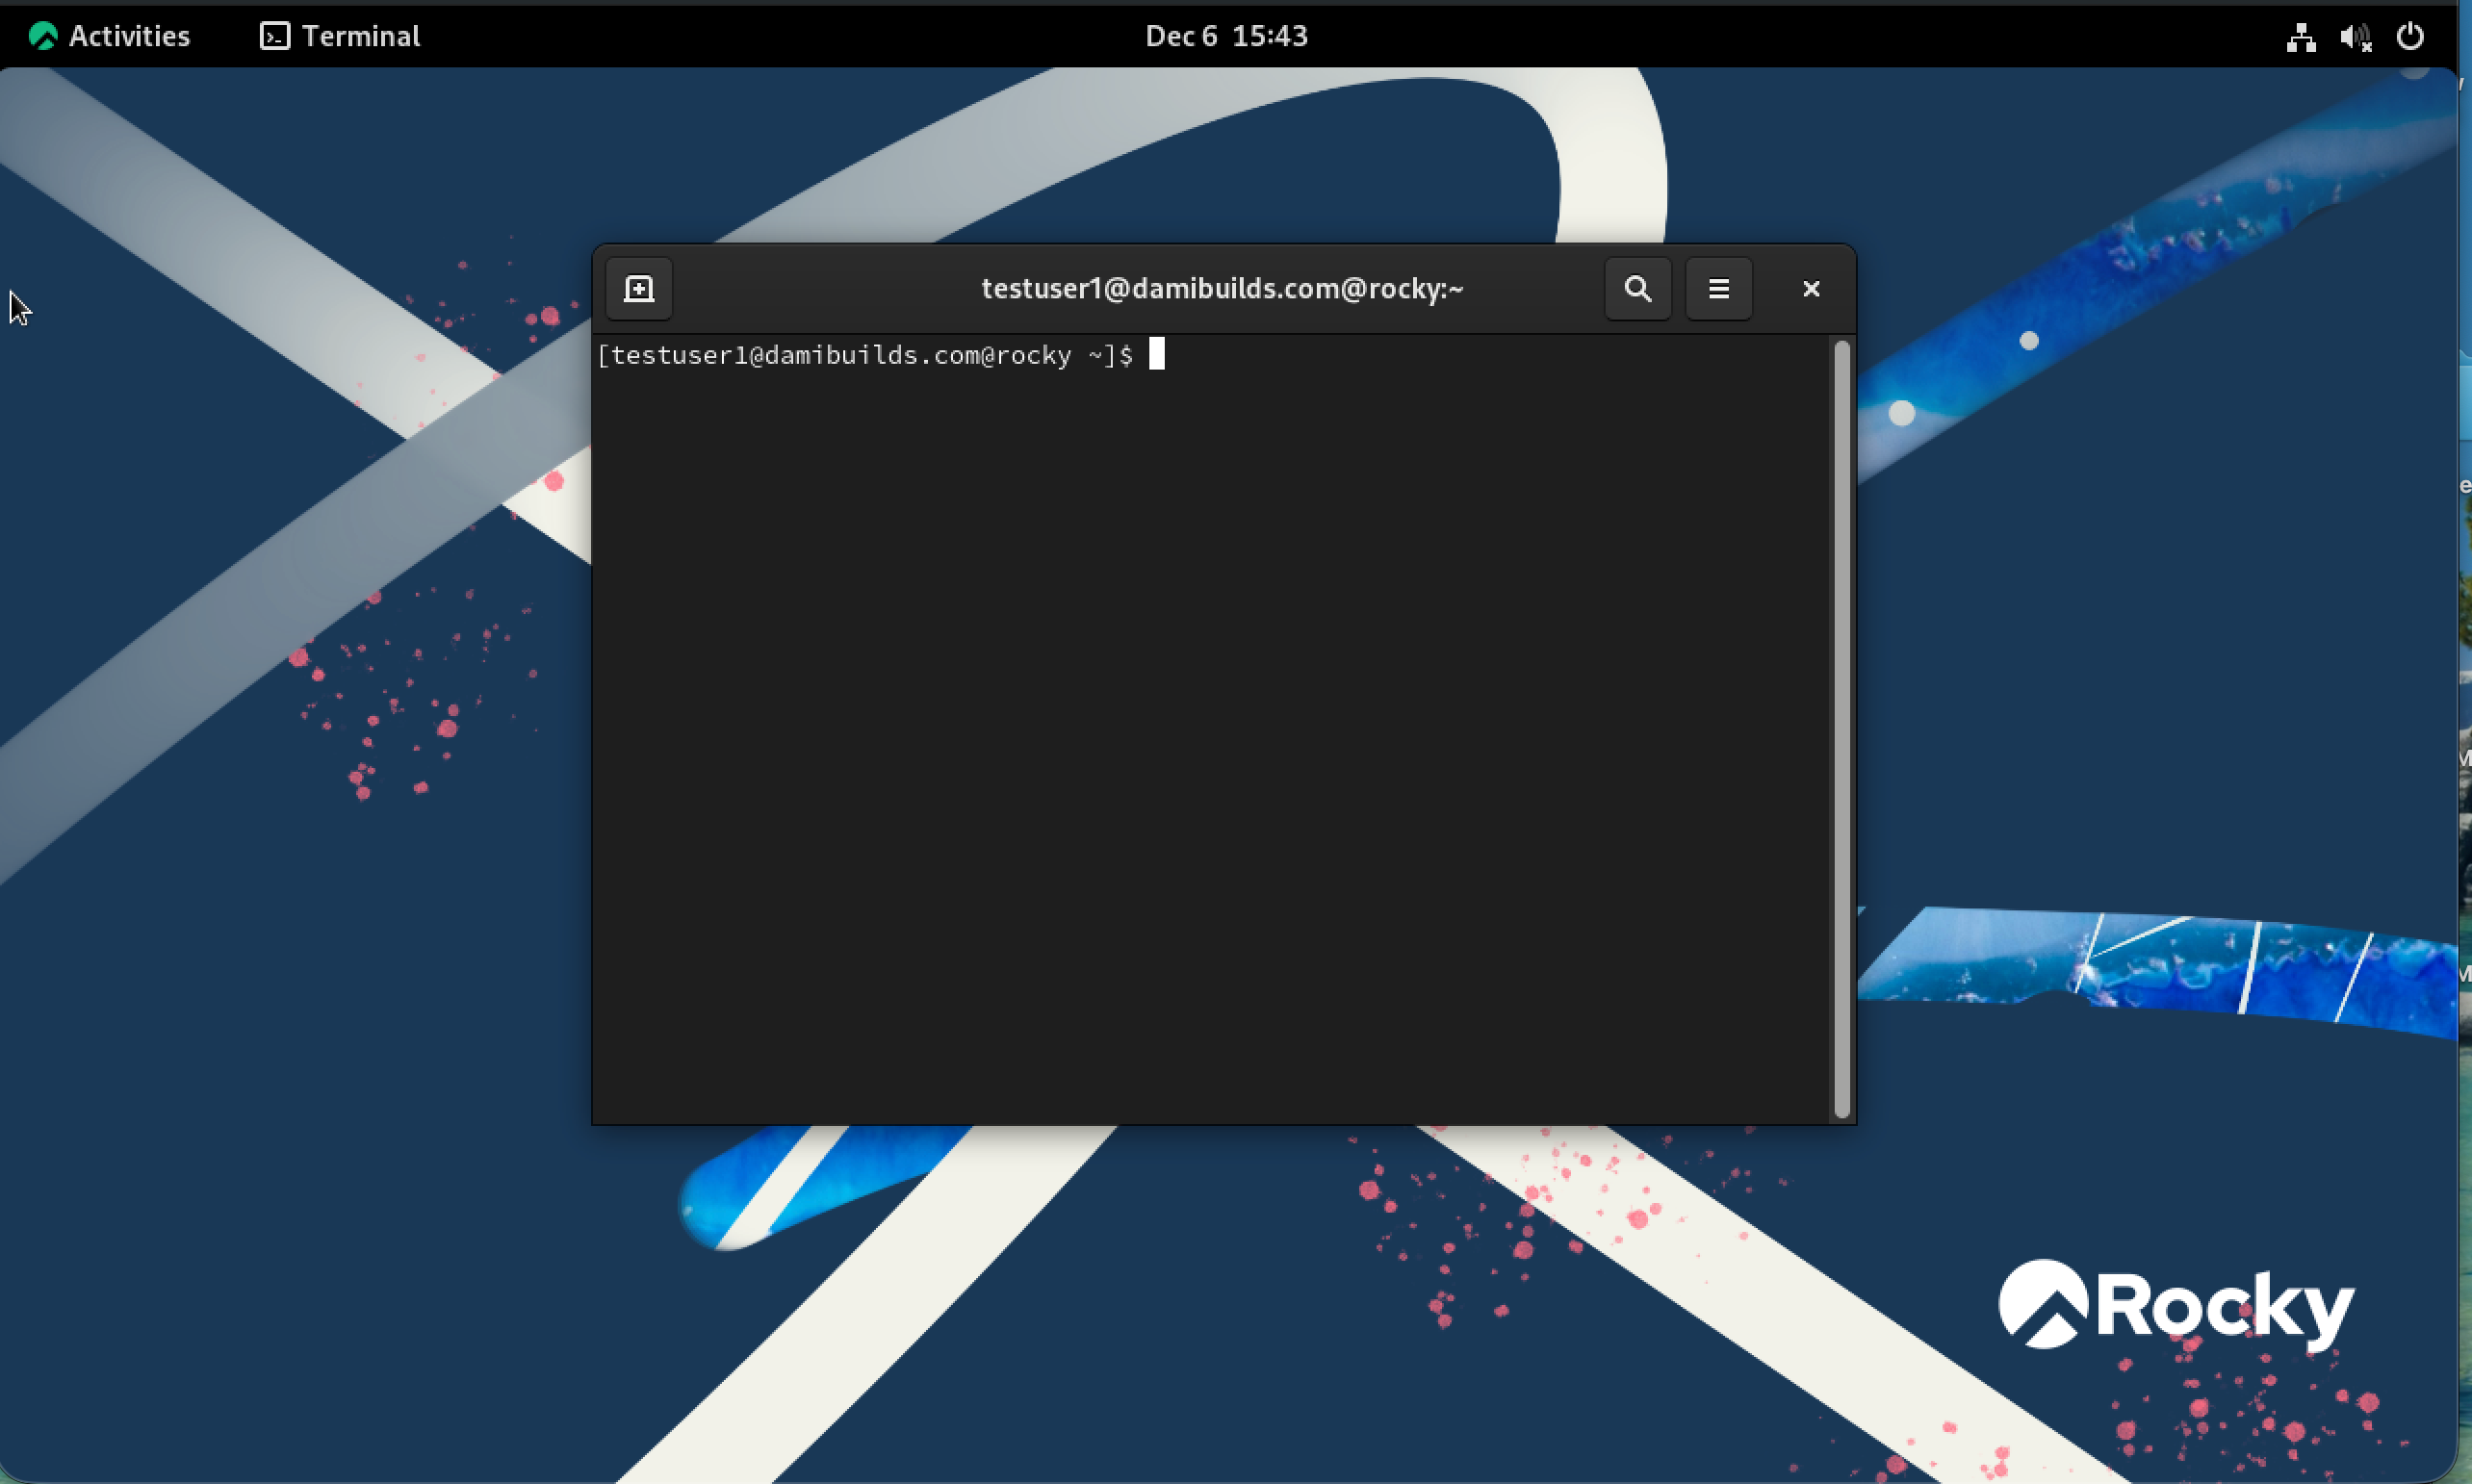
Once you get into the desktop as testuser1, AD login via GUI is confirmed.
You can verify in a terminal:
whoami
id
pwd
You are now logged in as an AD user on Linux, just like logging into a domain joined Windows machine.
Final Thoughts
Linux Active Directory integration fails for very specific reasons. Time drift breaks Kerberos. Incorrect DNS breaks discovery. Network modes break visibility. None of these failures recover gracefully.
Once DNS resolves only the domain controller, time is synchronized, and the machines are isolated correctly, the join process itself is uneventful. realm join either succeeds or it does not. When it succeeds, everything else falls into place: SSSD, Kerberos tickets, identity lookup, and logins.
This lab reflects how Linux operates in real environments. It consumes what the infrastructure provides and behaves accordingly.
If the steps in this write-up make sense to you without memorization, you understand the system well enough to debug it when it breaks. That understanding matters more than the join itself.